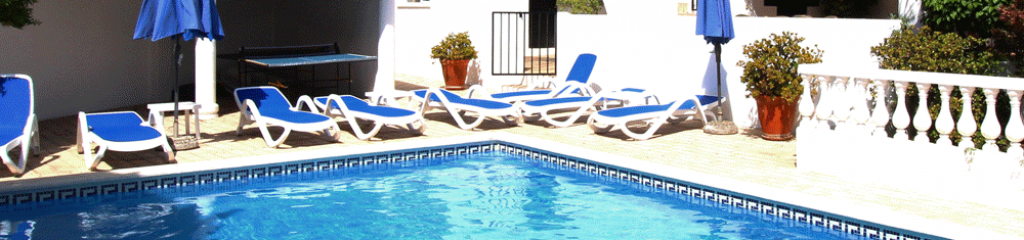
My wife, Rose, and I bought Casa Luessa in 2014 on the basis that the villa had charm, a large site, a great location (not too close ,not too far from Carvoeiro) , a great swimming pool and a large garden. The villa did need a lot of TLC to get it back to its best but we knew that from the start.
The following shows some of the work done to bring Casa Luessa up to its current high standard. My wife and I were very lucky in finding Nolasco Raposo (architect) and Joao Luso (building contractor) who led us through the whole process producing outstanding results in a friendly, helpful manner. I have absolutely no hesitation in recommending this team to deliver any similar projects that the reader may have in mind and have provided contact details below.
My contact details for verbal testimonial are baind@eircom.net / 00353 852083648
Nolasco Raposo – 00 351 96 4226353 – nolascoraposo.arquitectos@gmail.com
Joao Luso – Builder – 00 351 96 4036898 – lusojoao@gmail.com
Similarly the local kitchen designers in Portimao did a fantastic job with our new fitted kitchen….Highly recommended.
Cozinhas Diamantino – 00 351 282 426422 – cozinhasdiamantino@sapo.pt
![]()
![]()
![]()
![]()
![]()
![]()
![]()
![]()
This section details the work on the flat roof.
The primary drivers for working on the flat roof terrace were seepage of water through the existing tiles. We could have just replaced the tiles but the recommendation was to add state of the art insulation against water and temperature in order to significantly reduce the winter dampness associated with concrete houses in the Algarve.
By keeping both the water out and insulating the inside of the house from the outside temperature (helps retain heat inside house in winter and keeps house cooler in the height of summer) the villa will feel more comfortable throughout the year.
Roof Insulation 1
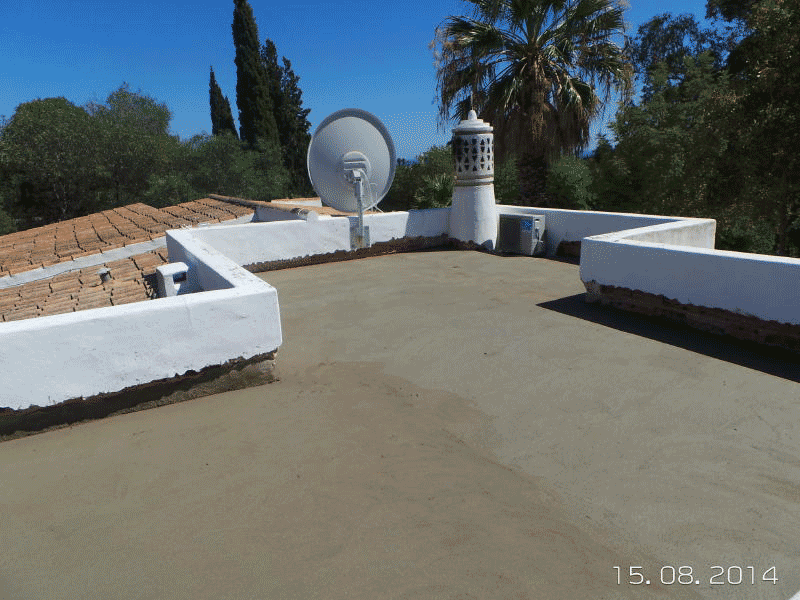
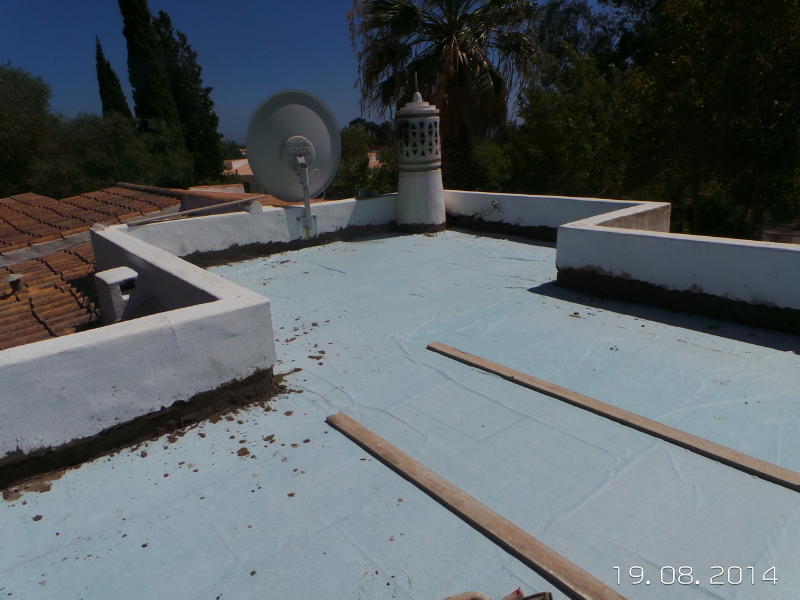
First the old tiled roof is removed and the surface is motared to create the right slope to prevent pools of water residing on the roof.
Roof Insulation 2
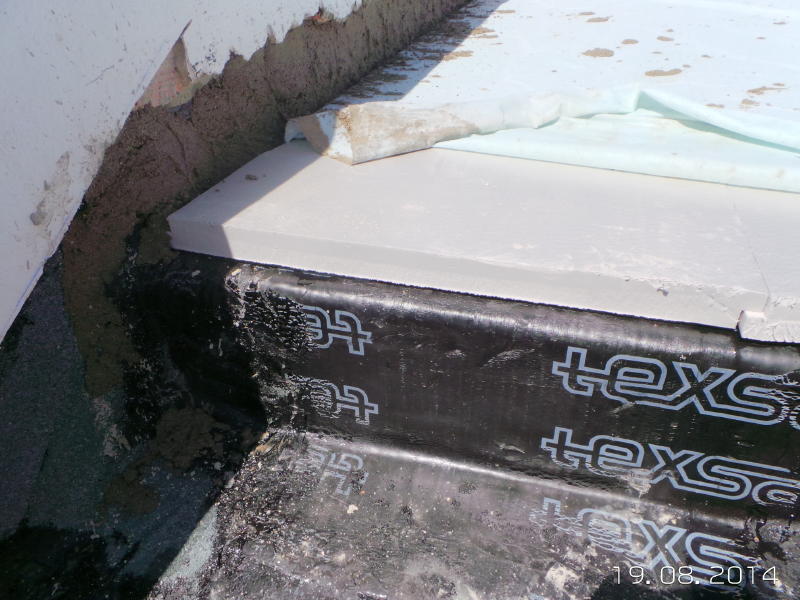
The top of the stairs leading to the roof terrace shows the underlying water integrity layer under the thermal insulation layer. NOTE: Water barrier extend up the vertical wall a few inches to prevent water ingress at edges.
Roof Insulation 3
A further water insulation layer is placed on top of the thermal insulation layer.
Roof Tiling
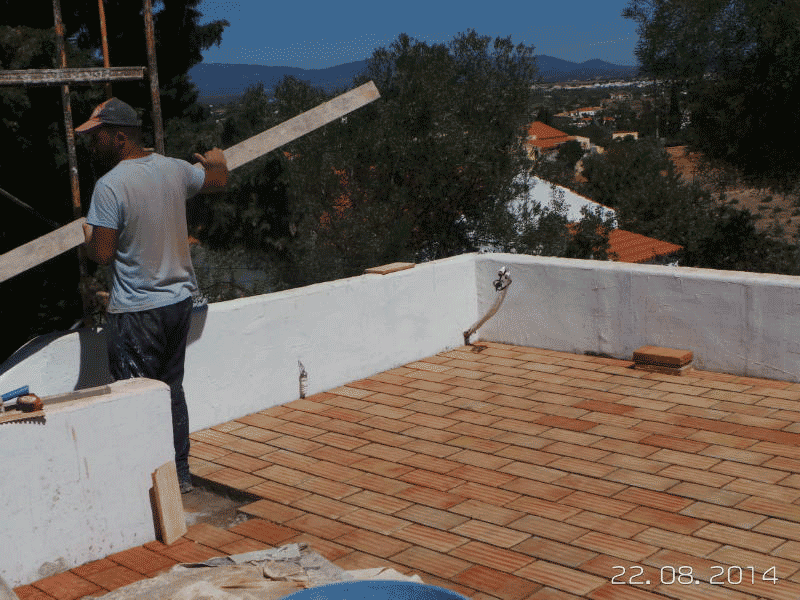
The roof is finally mortared and tiled with St Catherine traditional clay tiles that are not slippy and remain relatively cool to the touch.
This section details the work on the solar panels. 
The primary drivers for solar panels are
- safety (removal of original gas boiler).
- economy (almost eliminates water heating)
- ecology (greatly reduces carbon footprint).
Solar Panels 1
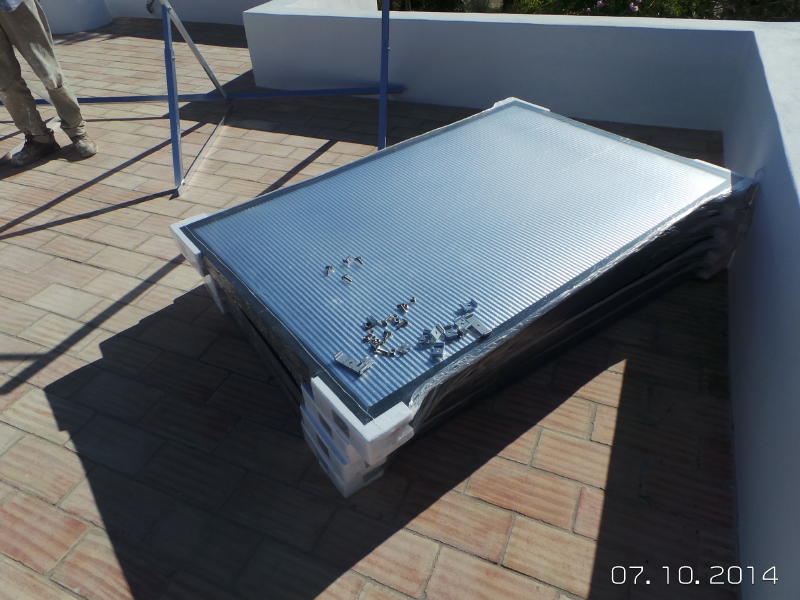
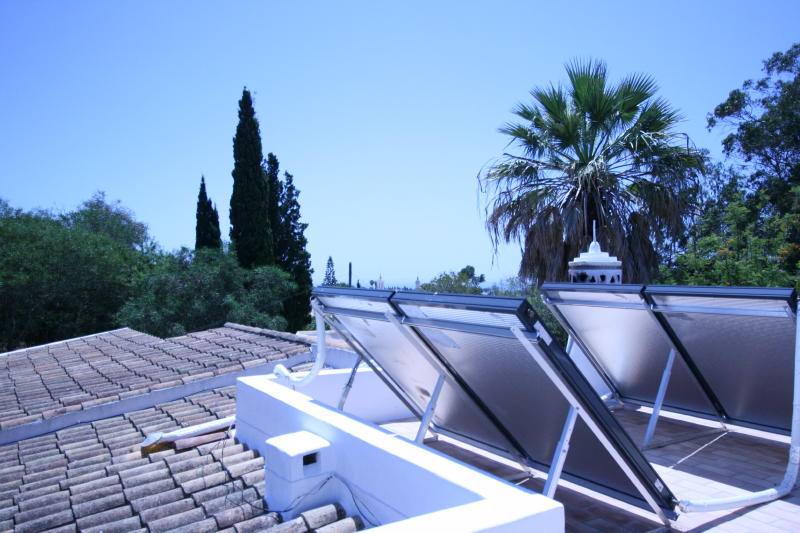
The four solar panels prior to being assembled on roof terrace. Four panels were installed to supply hot water to the villa to comfortably cater for maximum occupancy of eight people.
Solar Panels 2
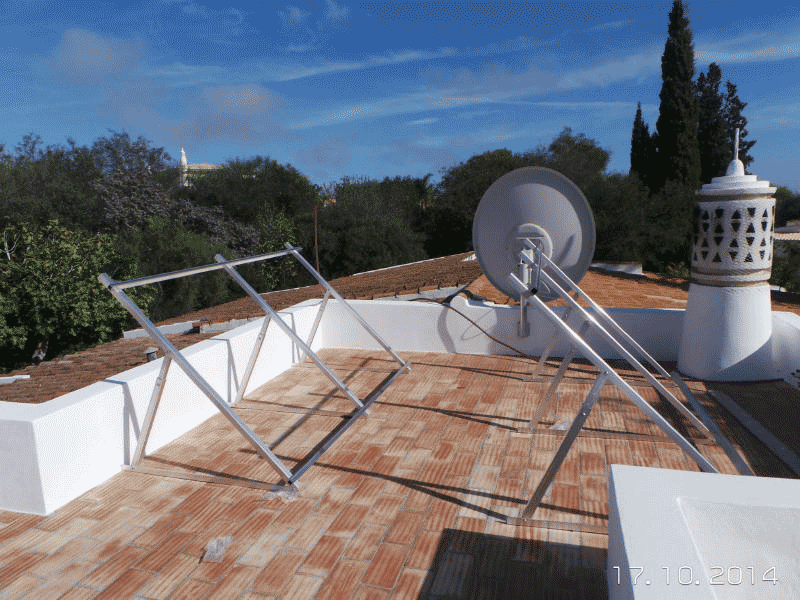
Frame mounts panels at optimum angle. TV satellite system moved to prevent shadowing. The panels are placed to the side such that there is plenty room left for taking in the view, sun bathing etc
Solar Panels 3
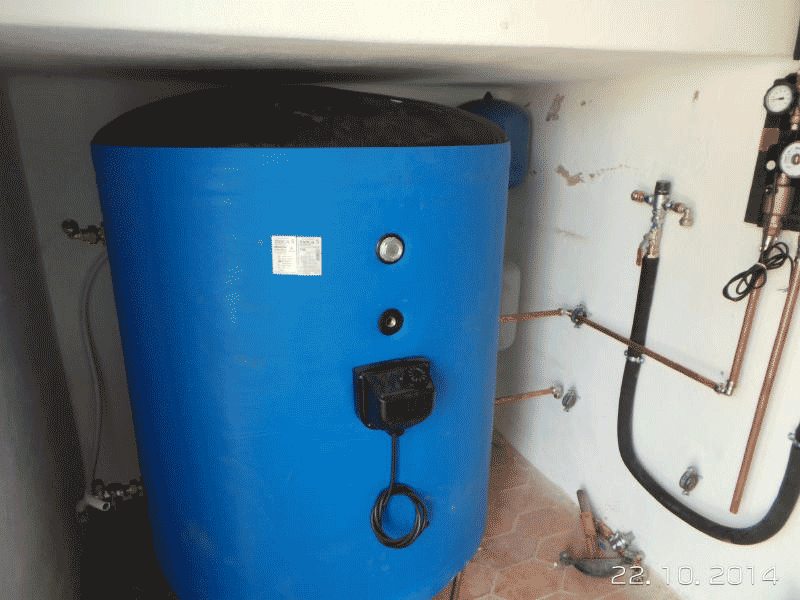
The massive very well insualted water tank is situated within the utility room. The water is pumped as required to maintain a high pressure supply to kitchen/bathrooms and is typically around 65 degrees C in summer. Tank contains an immersion heater to top up the temperature as required during winter months.
Solar Panels 4
This section details Wall Insulation.
The primary drivers for insulation of the walls
- comfort (prevent water ingress through concrete walls).
- comfort (reduce heat loss/gain through walls)
- economy (reduce heating/dehumidifier use in winter).
- economy (the white micro cement exterior eliminates painting)
- ecology (reduces carbon footprint).
Wall Insulation 1
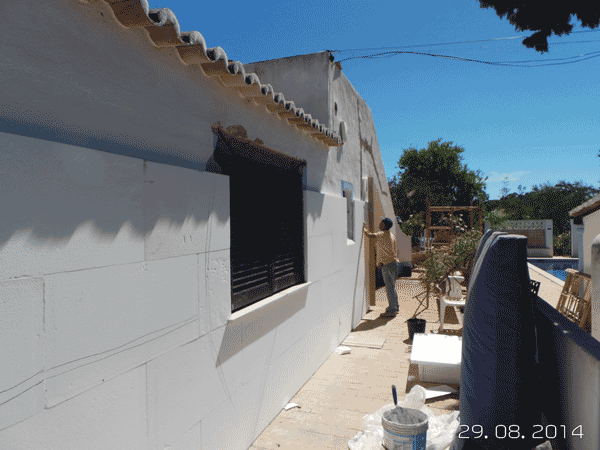
Approx 5cm thick insulation panels are attached to the original concrete walls to provide extra thermal insulation to the outside world.
Wall Insulation 2
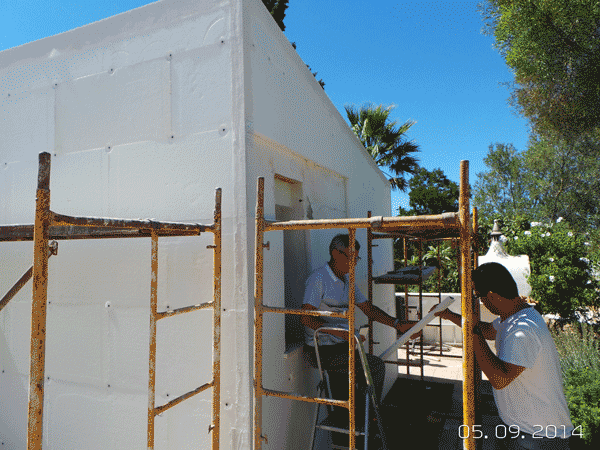
A smooth array of slabs of insulation cut to size guarantees no gaps. A system of webbing is used to stabilise the array at the corners prior to coating with further webbing and microcement
Wall Insulation3
The walls are finally coated with a layer of microcement. The advantage of this material is that it is white in nature and is guaranteed for 25 years before replacement. This eliminates the need for regular white-washing which is a costly and time-consuming issue for all villas in the Algarve.
Wall Insulation 4
This section details Window Replacement.
The primary drivers for window replacement
- comfort (insect screens/shutters give more light/air).
- ecology (state of the art glass insulation)
- security (shutters maintain privacy and increase security)
Original Window
The original windows had elegant but impractical iron work, no insect screens, ill-fitting shutters and poor thermal insulation. We decided to replace with state of the art window frames with excellent thermal properties incorporating electric shutters and insect screens.

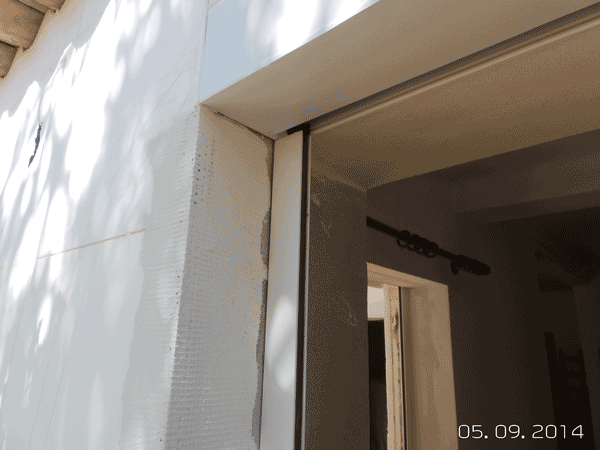
Window Insulation 1
With the flick of a switch the shutters will open to let the morning light flood into the room. The insect screen allows you to get fresh air into the bedroom whilst keeping animal life outside.
Window Insulation 3
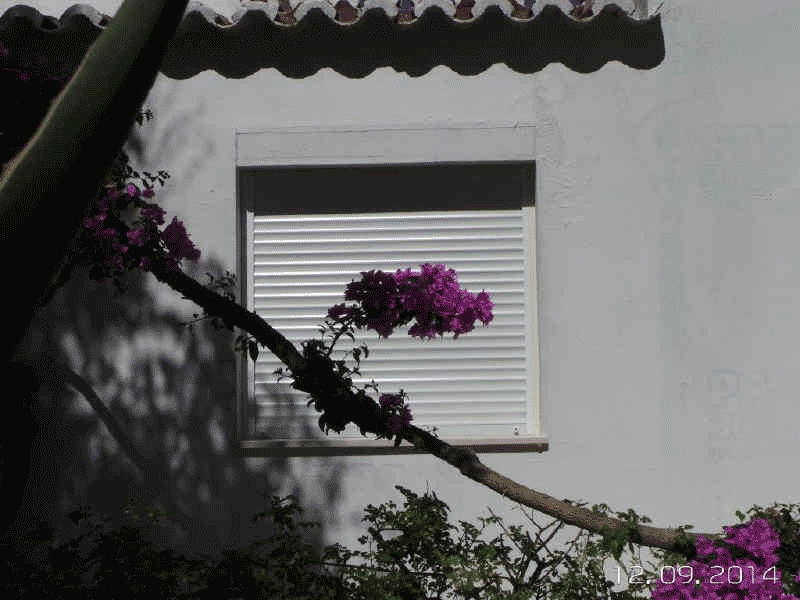
Closed window shutters offer complete privacy, shielding from the sun and enhanced security.
This section details Internal construction work.
The key driver here was to open out the dining/kitchen/living room space.
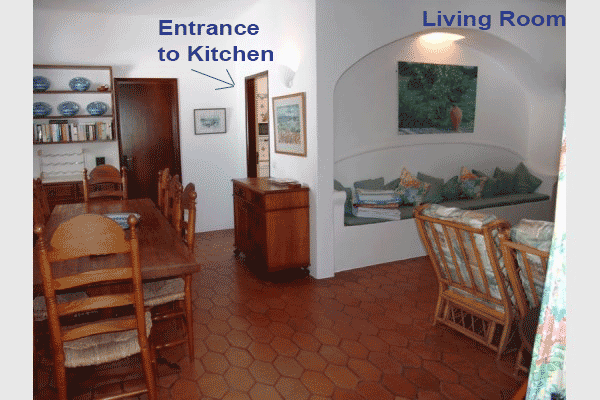
Original Layout
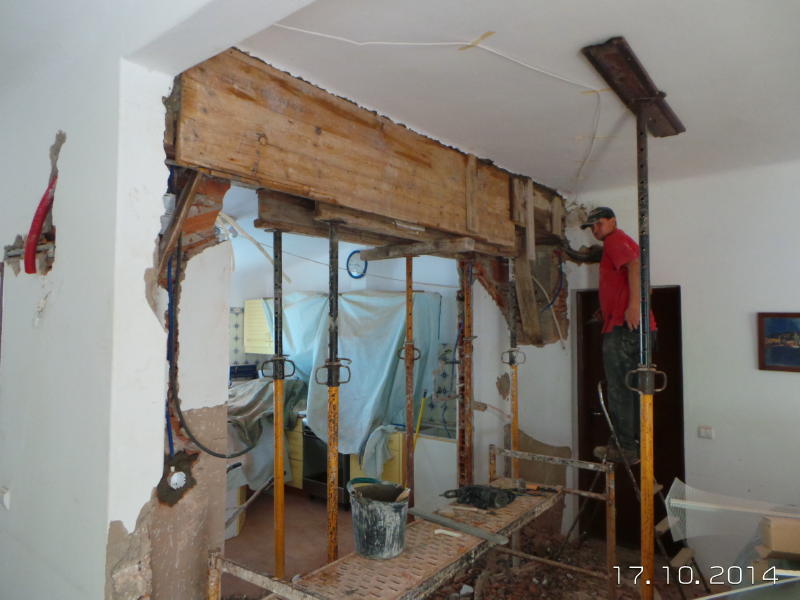
We decided to open out the area by sealing the existing door to the kitchen and remove the internal arched wall separating the kitchen from the living room. Nolasco (architect) discussed with Joao (builder) and confirmed could be done , drew up plans and off we went.
Internal 1
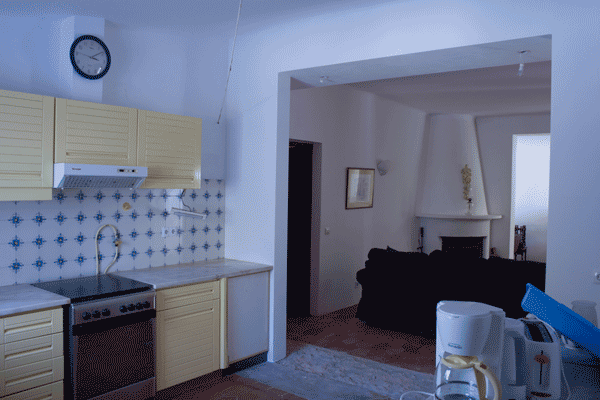
The extended view from inside the kitchen.
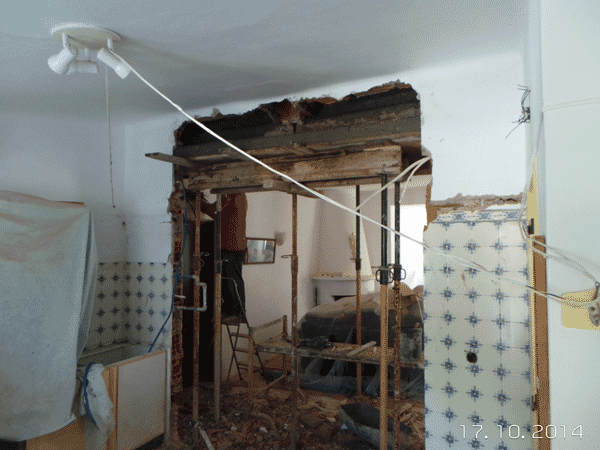
View from Original Kitchen
A very messy job indeed but the dust soon cleared and progress was steady
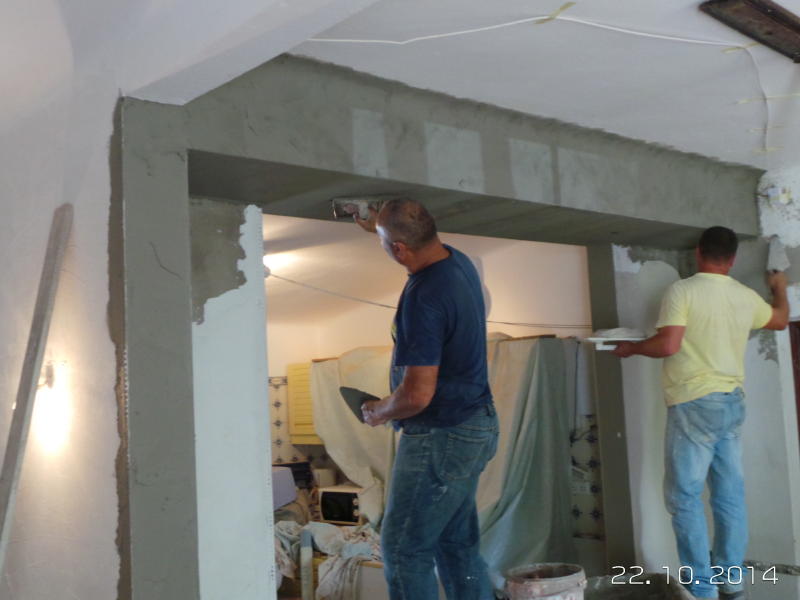
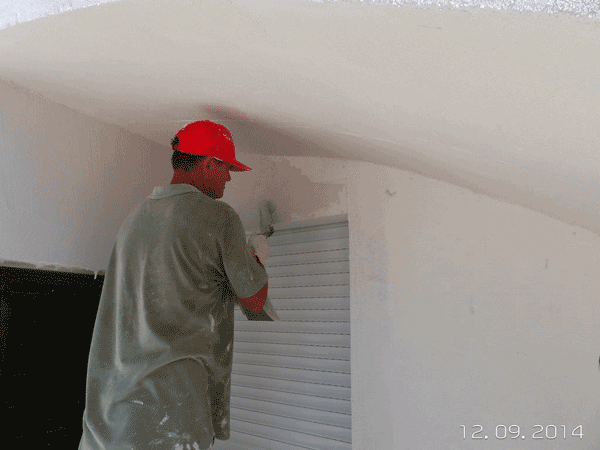
Plastering
And now it looks like this.
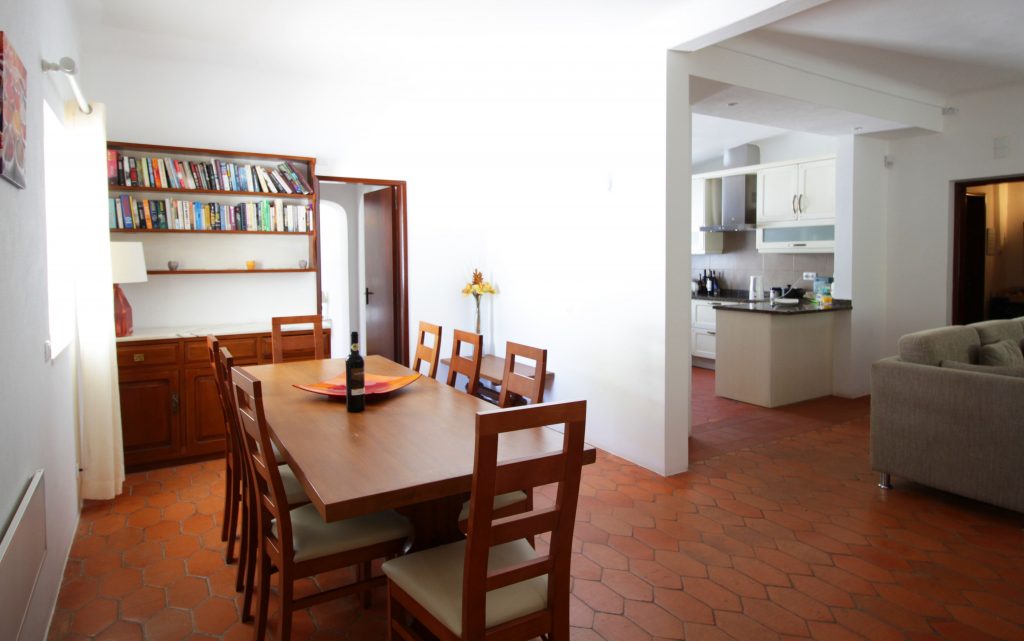
Open Plan Layout
This section details the new Kitchen.
The key driver here was to upgrade the ‘tired’ kitchen.
Cozinhas Diamantino – Is a small business we came across whilst browsing through the streets of Portimao. I cannot recommend these guys highly enough. They gave us many ideas, were very flexible, drew up very lifelike computer simulations and even right at the last minute allowed us to revise our choice of marble worktops with no hassle.
Original Kitchen
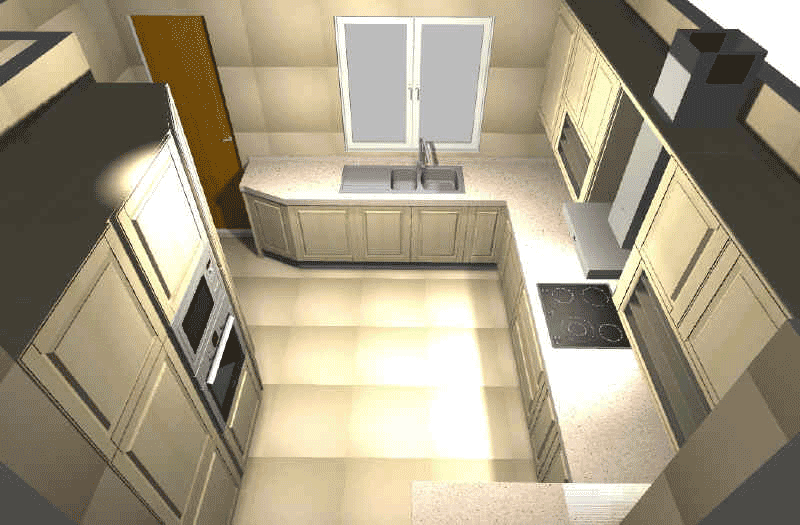
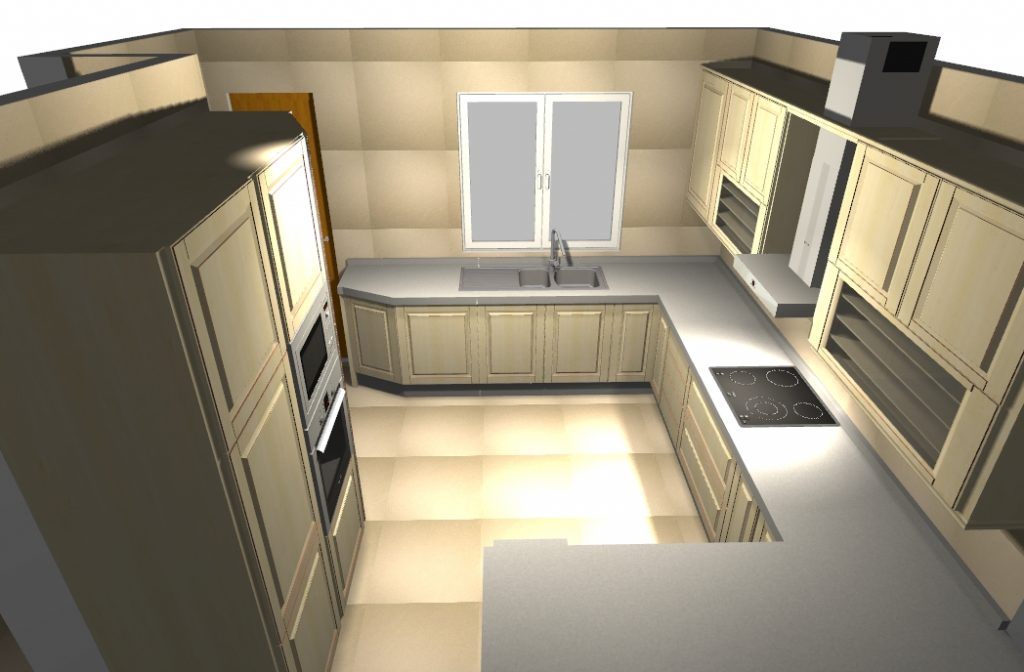
Computer Simulation 1
1st Computer simulation of the kitchen in our finish of choice.
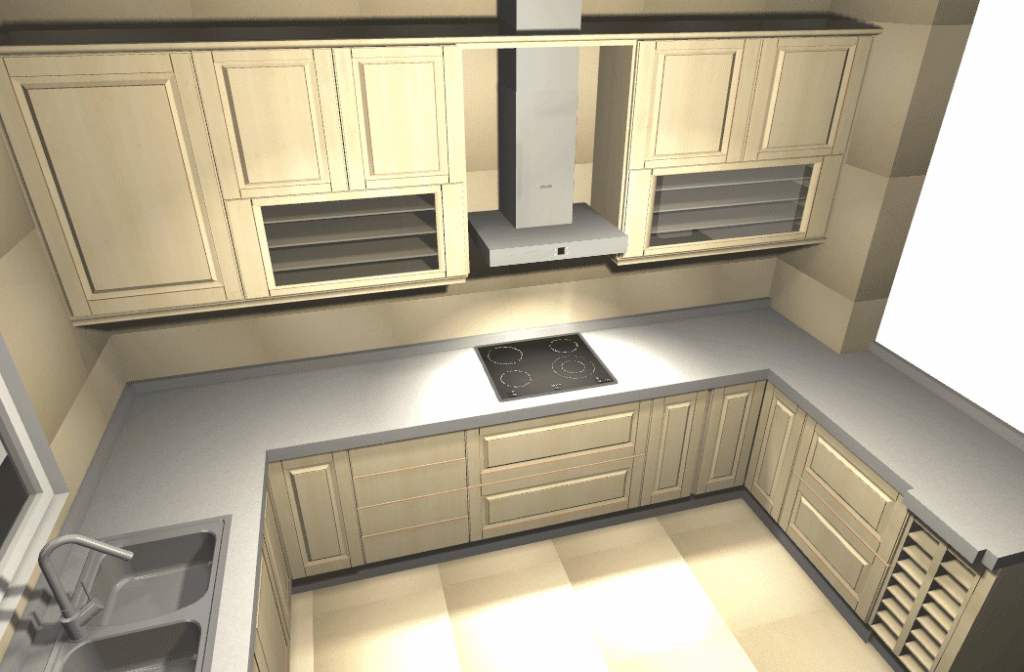
Kitchen Simulation 2
A second view from the computer simulation.
Kitchen Simulation 3
A further simulated view looking from the living room
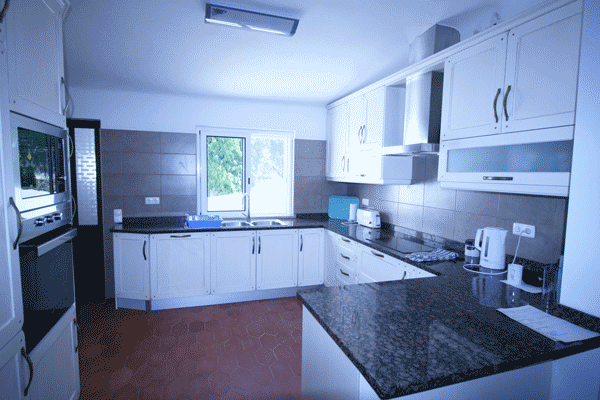
New Kitchen Completed
This section details the new sloped roof.
The key driver here was to further upgrade the thermal insulation and prevent any water ingress over the humid winter months.
We discussed the upgrade of the existing roof with Joao the builder. While it was hoped that we could retain some of the weathered tiles of the existing roofing material this proved to be impossible as too many broke during removal. The whole existing roofing tiles needed to be removed to install the thermal and water insulation layers underneath. This would prove to reduce the temperature in the villa during the hot summer months and maintain the temperature inside the villa during the winter months thereby eliminating water condensation.

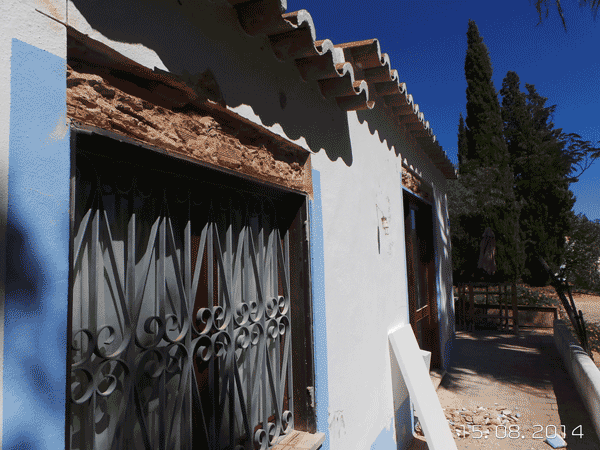
Original Roof
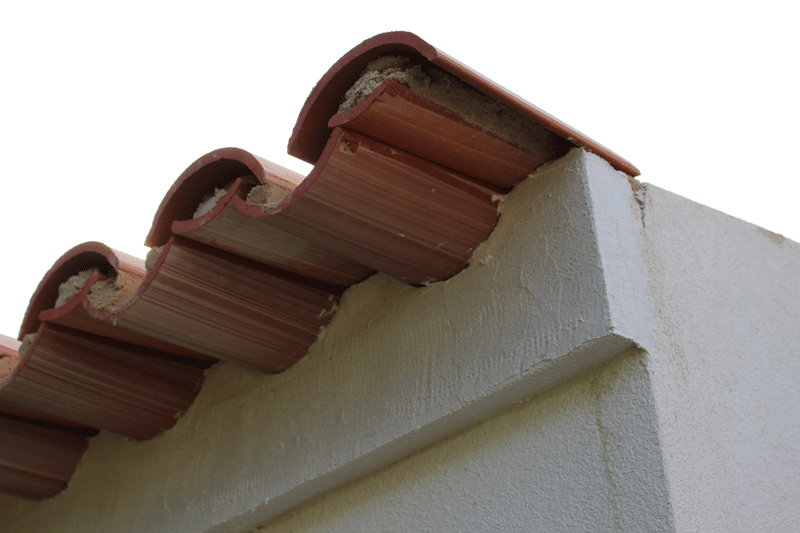
Roof Overhang
This image shows the extended overhang of the new roof with respect to the walls to prevent water from running down the walls. It also shows the extra insulation layer of approx 1 ft height under the tiles. This is designed to maintain thermal insulation integrity and is only present because we decided to carry out the work on the walls prior to finishing the roof. Normally this would not be present if you insulate the whole house at the one time.
New Sloped Roof 1
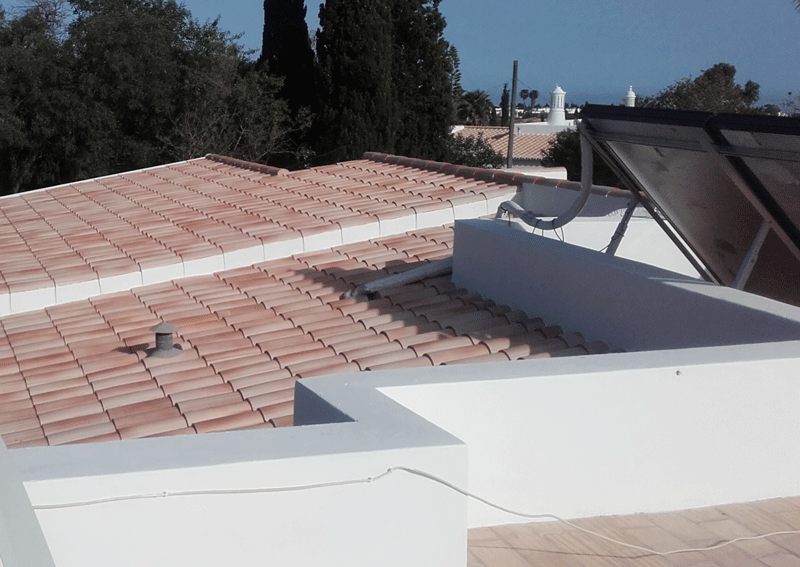
A view of the completed roof. As we chose the same style of tile it sits very well with the latent rustic charm of the villa and the surroundings.
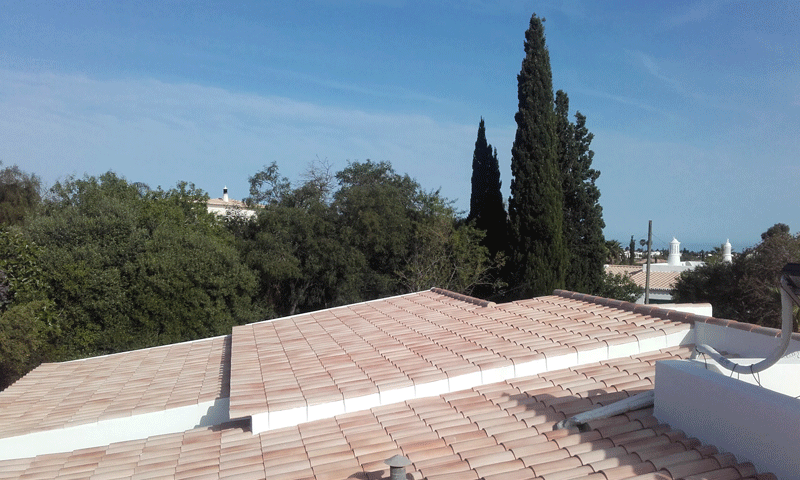
New Roof 2
Clean lines of new roof look great!
I hope you got something out of the work done.
The photographs were supplied by the architect to keep us fully informed of all of the works and helping us make all of the choices that need to be made. The work is of an outstanding quality and I would have no hesitation in recommending this team for any projects you might have, waiting to be executed.